Snom
- daygabrielcrochet

- Mar 11, 2022
- 3 min read
Updated: May 8, 2024

Here's a cute little amigurumi inspired by the Pokémon Snom!
Quick story:
My friend's kid asked me to make a Snom for him.
Me: What in the world is a Snom?
Him: It's a Pokémon.
Me: Not from my day!
Needless to say, I had to Google it lol Anyway... here's the pattern!

Pattern:
Looking to enhance your collection with the printer-friendly version? Unlock the ad-free edition of this pattern by making a purchase today!
Materials:
Yarn [weight: medium (4) 100% acrylic] or any comparable yarn will work just as well:
White
Baby Blue
Hook: 2.75 mm
Polyester fiberfill
Scissors
Yarn needle
12 mm black eyes
Stitch marker
Key:
R - row/round
MR - magic ring
sc - single crochet
inc - increase
dec - decrease
FO - finish off
Notes:
Pattern is worked in continuous rounds.
Pattern written in U.S. terminology.
I place my marker on the last stitch of the round.
Let's begin!
Head
R1: with white, MR 6
R2: inc around - 12
R3: (1 sc, inc) x 6 - 18
R4: (2 sc, inc) x 6 - 24
R5: (3 sc, inc) x 6 - 30
R6: (4 sc, inc) x 6 - 36
R7: (5 sc, inc) x 6 - 42
R8 - 15: 42 sc
Add eyes between rows 13 - 14 on lower sides of body.
Count 10 stitches from last stitch, insert eye here.

Body
Stuff as you go.
R17 - 30: with baby blue, 42 sc
R31: (5 sc, dec) x 6 - 36
R32: (4 sc, dec) x 6 - 30
R33: (3 sc, dec) x 6 - 24
R34: (2 sc, dec) x 6 - 18
R35: (1 sc, dec) x 6 - 12
R36: 6 dec around, FO.

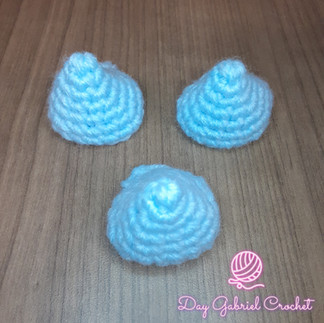
Spikes (10)
R1: with baby blue, MR 4
R2: (1 sc, inc) x 2 - 6
R3: (1 sc, inc) x 3 - 9
R4: (2 sc, inc) x 3 - 12
R5: (3 sc, inc) x 3 - 15
R6: (4 sc, inc) x 3 - 18
R7: (5 sc, inc) x 3 - 21
R8: 21 sc, FO.

Rear Spikes (3)
R1: with baby blue, MR 4
R2: (1 sc, inc) - 6
R3: (1 sc, inc) - 9
R4: (2 sc, inc) - 12
R5: (3 sc, inc) - 15
R6: (4 sc, inc) - 18
R7: 18 sc, FO.
Final Spike
R1: with baby blue, MR 4
R2: (1 sc, inc) - 6
R3: (1 sc, inc) - 9
R4: (2 sc, inc) - 12
R5 - 7: 12 sc, FO.
Mouth (2)
R1: with white, MR 6
R2: inc around - 12
R3 - 6: 12 sc, FO.

Attach the spikes. Begin with the center spike, attach between rows 18 and 24. Add spikes to the left and right of center spike. Add final spikes on the end of this row.
Add another row of 5 spikes right behind first row. Attach 3 rear spikes behind the second row centering the middle spike. Attach final spike.
Attach the mouth.
Thank you!
Thank you very much and happy crocheting! If you have any questions, need help, or just want to provide feedback, please post a comment below.
Be sure to share your work! #daygabrielcrochet
You are welcome to sell any items made from the use of this pattern. Please give credit to @daygabrielcrochet. No wholesale.
Follow me on social media (Facebook, Instagram, Pinterest) @daygabrielcrochet.
* Do not sell, change or claim this pattern as your own. *
Designed by Annie Gabriel of DAY Gabriel Crochet™.
Want to get your hands on the printer-friendly version and add it to your collection? Purchase it here:
Not ready to make your own? No problem! Purchase your very own here by completing the custom order form at the bottom of the shop page:
I do not own the rights to this character, this item is intended to be fan art and nothing more.


Comments